
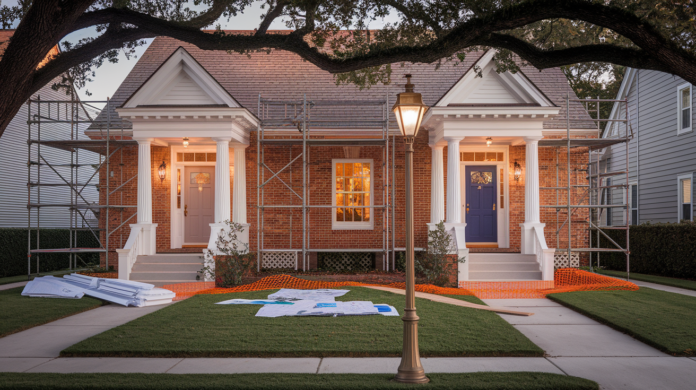
Think you can just add a kitchenette and call it a unit? Think again.
Converting a single-family home into two legal units can cut your mortgage with rent and let you live mostly free while you build equity.
But it only works if you follow the rules on zoning, structure, safety, utilities, permits, financing, and inspections.
This checklist gives a step-by-step roadmap from zoning confirmation to certificate of occupancy so you avoid code violations, surprise costs, and wasted time.
The Complete Multi-Unit Conversion Checklist for House Hacking Success

Converting a single-family home into a multi-unit property gives you rental income that offsets your mortgage and a shot at living almost free while you build equity. The strategy works when you follow a clear roadmap covering zoning, structure, safety, utilities, and money. Most house hackers don’t realize how complex it is to create legally separate units and end up with code violations, failed inspections, or surprise costs that kill the whole thing.
This checklist walks through every step from zoning confirmation to final occupancy. You’ll create two independent living spaces, each with a sleeping area, full bathroom, full kitchen that includes sink and stove and refrigerator, and at least one exterior door for egress. Each unit has to meet minimum square footage rules, usually 400 to 500 square feet per unit. Bedroom sizes often need 70 to 80 square feet. Fire separation between units typically demands one-hour-rated assemblies using two layers of five-eighths-inch Type X drywall on each side, plus fire-rated doors (20 to 60 minutes). Egress windows in sleeping rooms need at least 5.7 square feet of opening area, at least 20 inches clear width, and a sill no higher than 44 inches above the floor. You’ll also install hardwired and interconnected smoke and carbon monoxide detectors with battery backup, separate HVAC zones or systems, and upgraded electrical service to a 200-amp panel in most cases.
Here’s your complete conversion checklist:
- Verify zoning allows multi-family use or accessory dwelling units. Confirm setbacks, density limits, parking minimums, and owner-occupancy requirements.
- Measure square footage and sketch layouts to confirm you can fit two legal units with separate entrances, kitchens, and bathrooms.
- Hire a structural engineer to check load-bearing walls, foundation capacity, and any reinforcements needed for layout changes.
- Get an architect or designer with multi-unit experience to produce permit-ready plans covering egress, fire separation, plumbing, electrical, mechanical, and energy compliance.
- Apply for building, electrical, plumbing, mechanical, and change-of-use permits. Budget 4 weeks to 6 months for plan review depending on how complex your jurisdiction is.
- Secure financing through a HELOC, cash-out refinance, renovation loan like FHA 203(k) or HomeStyle, or private bridge funding if needed.
- Hire a licensed general contractor experienced in complex conversions. Verify insurance, check references, and lock in a milestone-based payment schedule.
- Execute construction phases: demo, framing and structural work, rough plumbing and electrical and HVAC with inspections, insulation, drywall and finishes, final inspections.
- Install separate utility meters for electricity and water and gas where required or feasible. Set up a clear billing policy if meters can’t be separated.
- Get certificate of occupancy for both units, register addresses with the city and postal service, set up landlord insurance, photograph units, and prepare leases and tenant screening criteria.
The sections below walk through each checklist item in detail, including cost ranges, financing options, code requirements, contractor selection, and tenant management so you can execute the conversion without backtracking or budget surprises.
Zoning and Legal Requirements for a Single-Family to Multi-Unit Conversion

Most single-family lots sit in R-1 residential zoning districts that prohibit multi-family use or limit density to one dwelling per lot. Before you spend a dollar on plans or permits, pull the zoning map from your city or county planning department and read the code sections that govern your parcel. You need to confirm whether duplexes or accessory dwelling units are allowed by right, require a conditional use permit, or demand a full zoning variance. Variance and conditional-use processes often take four weeks to six months and sometimes include public hearings, neighbor notification, and planning commission approval, so start this early.
Check parking minimums next. Many jurisdictions require one to two parking spaces per unit and failing that test can block your entire project. Also verify setback rules for new construction or entrances, historic district restrictions if your home sits in a preservation overlay, and any owner-occupancy requirements tied to ADU allowances. Some cities cap ADU size at 800 square feet or restrict placement to rear yards only. If you plan to rent both units and live elsewhere, confirm that the zoning code and any homeowner association rules permit non-owner-occupied rentals. Rental licensing requirements vary widely. Register your units with the city if required and budget for inspection fees or business licenses. For a detailed walkthrough of zoning eligibility, see Converting Single Family Home Into Rental Units for House Hacking Success.
| Requirement | Why It Matters | Typical Standard |
|---|---|---|
| Zoning district allowance | Determines if multi-family use is legal on your lot | R-1 often prohibits; R-2 or ADU overlays may allow with conditions |
| Parking spaces per unit | Insufficient parking can require variance or kill project | 1–2 spaces per unit; driveway or on-street count varies by city |
| Minimum unit size | Ensures habitable space meets code definition of dwelling | 400–500 sq ft per unit; bedrooms 70–80 sq ft |
| Owner-occupancy rule | Some ADU or duplex permits require owner to live on-site | Common in ADU-friendly zones; verify local ordinance |
Structural and Layout Planning for Creating Multiple Rental Units
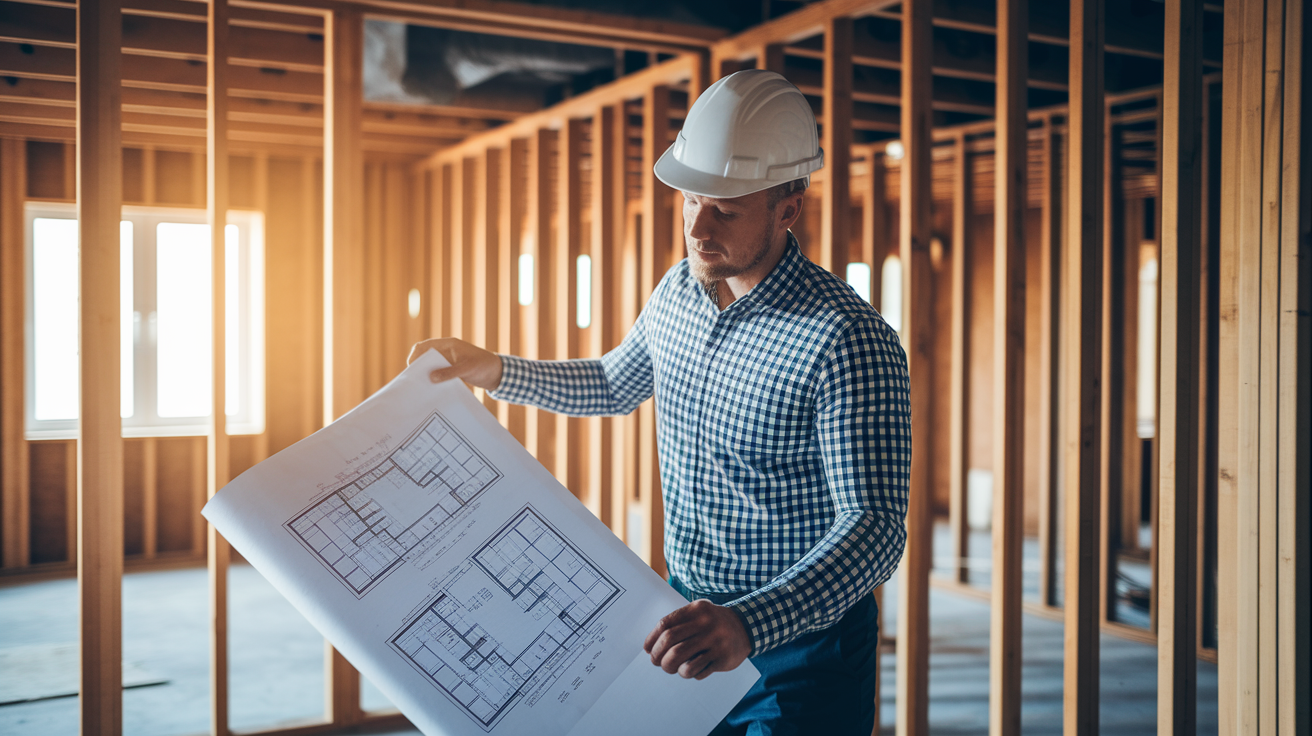
Once zoning is clear, bring in a structural engineer to check whether your home can support the layout changes you need. The engineer will look at load-bearing walls, foundation capacity, floor joist spans, and roof structure to confirm you can safely remove walls, add bathrooms with plumbing loads, or build a second story or addition if needed. Older homes often require foundation reinforcement or steel beam installation when you open up interior partitions to create separate unit entries or shared hallways.
Plan separate exterior entrances early. That’s a core legal and practical requirement for two independent units. Common solutions include a front-rear split where one unit uses the main entrance and the other uses a new back or side door, or adding an exterior staircase to create a separate entry for a basement or upper-floor unit. Interior layouts should stack wet rooms where possible to cut plumbing runs and costs. Each unit has to have a sleeping area, a full bathroom with toilet and sink and tub or shower, a full kitchen with sink and stove and refrigerator, and direct access to an exterior exit. Kitchenettes with only a microwave and mini-fridge don’t qualify as full kitchens under most building codes.
Major structural considerations include:
- Removing or relocating load-bearing walls often requires steel beams, engineered lumber headers, or column supports. Budget $10,000 to $30,000 or more depending on span and reinforcement needs.
- Adding a second-story unit demands foundation evaluation, potential underpinning, and engineered floor framing. Costs commonly run $150 to $300 per square foot for the addition.
- Basement conversions require egress windows with minimum opening dimensions, moisture control, and often headroom adjustments. Expect $50 to $150 per square foot.
- Garage conversions need foundation slab pour or leveling, wall framing, insulation, and full utility extensions. Budget similar to basement finish costs.
- Creating separate staircases or entrances typically costs $5,000 to $20,000 depending on height, materials, and whether you’re building exterior or interior stairs with landings and railings.
Utility Separation and Systems Upgrades for House Hacking Conversions
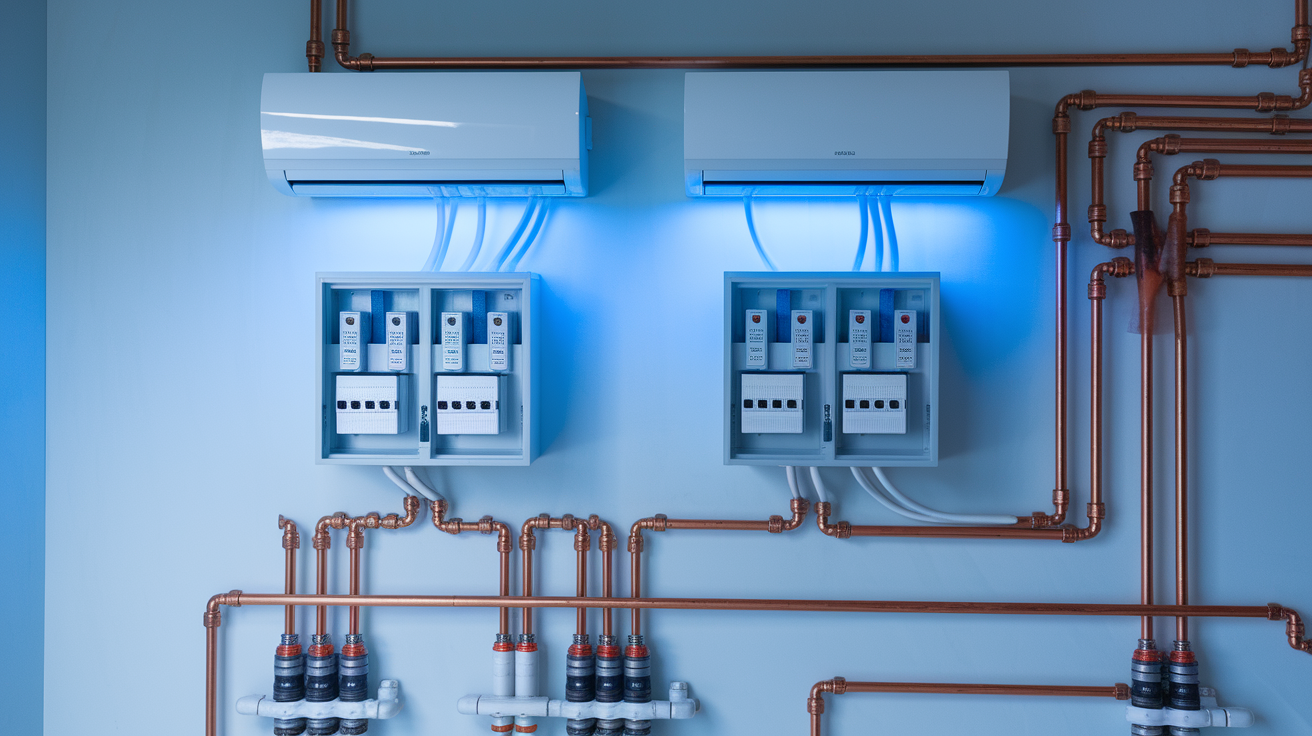
Electrical service upgrades top the list for most conversions because older single-family panels run 100 to 150 amps, which isn’t enough when you add a second full kitchen, laundry hookups, and independent HVAC systems. Upgrading to a 200-amp main panel and installing a second sub-panel for the new unit commonly costs $8,000 to $15,000 including utility company coordination, meter base replacement, and code-required circuits. Each unit needs dedicated circuits for major appliances like ranges and refrigerators and dishwashers, plus GFCI protection in bathrooms and kitchens and outdoor outlets, and proper grounding throughout.
Plumbing separation means installing a second water heater, running new supply and drain lines to the new kitchen and bathroom, and adding shut-off valves for each unit. If your jurisdiction or lease structure requires separate water metering, budget for a second meter hookup, which can add several thousand dollars depending on utility policies and distance to the meter vault. Natural gas lines also need independent shut-offs and sometimes require a second meter if you’re creating legally separate addresses. Sewer and water tap fees sometimes apply when converting to multi-family use. Check with your local utility before construction starts.
HVAC separation improves tenant comfort and simplifies utility billing. Ductless mini-split systems are popular for conversions because they avoid the cost and complexity of running new ductwork through finished spaces, and each indoor head operates independently with its own thermostat. A single-zone mini-split typically costs around $6,000 installed, while a multi-zone system serving two to three rooms runs $8,000 to $12,000. If you’re keeping a central forced-air system, install separate thermostats and damper controls or zone the ductwork so each unit has independent temperature control.
Utility Metering Options Explained
| Option | Cost | Best For |
|---|---|---|
| Separate meters (electric, water, gas) | $2,000–$8,000 total depending on utility hookup fees and distance | Long-term rentals where tenant pays all utilities directly to provider |
| Sub-metering (landlord reads and bills tenant) | $500–$2,000 for sub-meter hardware plus monthly admin time | Situations where utility won’t install second meter but you want usage tracking |
| Flat utility fee in rent with annual true-up | No hardware cost; requires lease clause and annual reconciliation | Small units where usage is predictable and you want simple billing |
| Landlord covers all utilities | No separation cost but higher operating expense and risk | High-rent markets where you can price utilities into rent and still compete |
Safety, Fire Separation, and Code Compliance for Multi-Unit Homes

Fire separation between dwelling units is a non-negotiable code requirement when you convert a single-family home to multi-family use. Most jurisdictions require a one-hour fire-rated assembly between units. That typically means installing two layers of five-eighths-inch Type X fire-rated drywall on each side of the separating wall or ceiling, and fire-rated doors with automatic closers rated for at least 20 minutes and often up to one hour. Fire separation extends to shared floors and ceilings, so if one unit sits above the other you’ll need the same rated assembly in the floor-ceiling system, which sometimes includes additional blocking, insulation, and resilient channels.
Egress windows in sleeping rooms have to meet strict size and accessibility standards to allow emergency escape and rescue access. The typical code minimum is an opening area of at least 5.7 square feet, a clear width of at least 20 inches, a clear height of at least 24 inches, and a sill height no more than 44 inches above the finished floor. Basement bedrooms often require cutting new window wells and installing larger windows to meet egress code, which adds $2,000 to $5,000 per window including excavation, well installation, and interior finish work. Every sleeping room and hallway outside sleeping areas needs a hardwired smoke detector, and carbon monoxide detectors are required near sleeping areas and fuel-burning appliances. Interconnected alarms with battery backup are standard so that when one alarm sounds all units hear it.
Your project will move through a series of inspections starting with rough framing to verify structural changes and fire blocking, then rough electrical and plumbing and mechanical inspections before you close up walls, an insulation inspection if required by your energy code, and a final inspection covering finishes, fixtures, egress, smoke alarms, and overall code compliance. Plan for at least one re-inspection per trade because inspectors commonly flag minor issues like missing junction box covers or incorrect GFCI placement. Only after final inspection approval will the building department issue a certificate of occupancy for each unit, which is your legal permission to rent or occupy the space.
Soundproofing, Privacy, and Comfort Upgrades for House Hackers

Soundproofing makes the difference between a livable house hack and a miserable experience for both you and your tenant. Sound travels through walls, floors, and shared ductwork, so address all three paths during construction. Start with insulation batts in all partition walls between units. Standard fiberglass or mineral wool rated for sound control will dampen airborne noise like voices and television. Resilient channels installed horizontally between the studs and the drywall create a decoupling layer that reduces vibration transfer. Adding a second layer of drywall on top of the resilient channels improves things further. Budget around $10,000 for a comprehensive soundproofing package covering partition walls and a shared floor-ceiling assembly in a typical conversion.
Floor noise is often worse than wall noise because footsteps and dropped objects create impact sound that insulation alone can’t block. Acoustic underlayment installed under finish flooring or carpeting with quality padding will reduce impact noise significantly. If the floor structure allows, add a layer of five-eighths-inch drywall or a dedicated sound-dampening product to the ceiling below before you install the finish ceiling. Separate HVAC ductwork and ventilation for each unit prevents sound and odors from traveling between units through shared ducts, which is a common complaint in poorly planned conversions.
Recommended soundproofing materials and methods:
- Insulation batts rated for sound control in all partition walls and floor-ceiling cavities.
- Resilient channels installed perpendicular to studs or joists before drywall to decouple surfaces.
- Double layers of drywall with staggered seams to increase mass and dampen vibration.
- Acoustic underlayment or carpet with thick padding to reduce floor impact noise.
- Separate HVAC and ventilation systems or at least separate duct branches with dedicated returns to prevent odor and sound transfer through shared ductwork.
Kitchenettes, Bathrooms, and Interior Fit-Out for New Rental Units
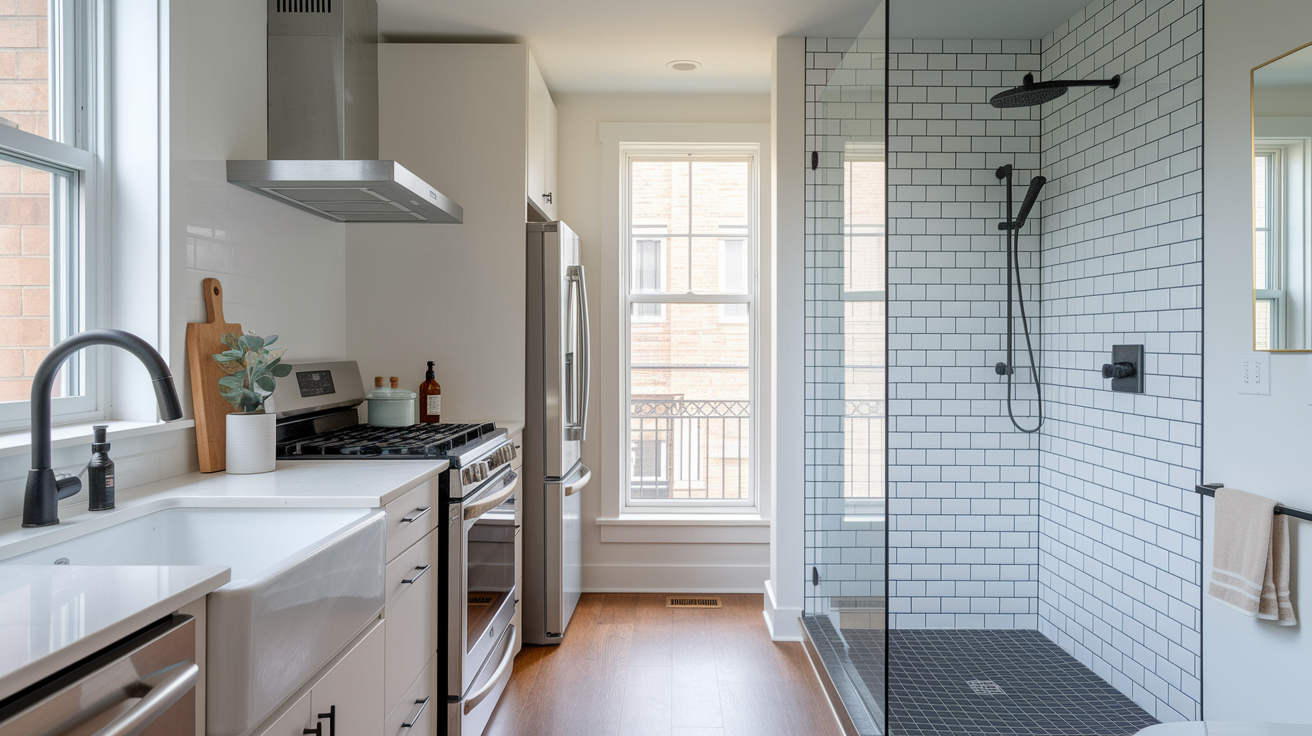
Every legal dwelling unit needs a full kitchen and at least one full bathroom. A full kitchen under most codes includes a sink with hot and cold water, a cooking appliance like a range or cooktop and oven, a refrigerator, and counter space for food preparation. Kitchenettes with only a microwave and mini-fridge don’t qualify, so plan for full-size appliances even in smaller units. Basic builder-grade kitchens with stock cabinets, laminate countertops, and entry-level appliances typically cost $8,000 to $12,000 installed. Mid-range finishes with semi-custom cabinets, quartz or granite countertops, and stainless steel appliances run $18,000 to $25,000, while high-end builds exceed $40,000.
Bathrooms have to include a toilet, sink, and bathtub or shower. The typical basic bathroom with a fiberglass tub-shower combo, builder-grade vanity, and vinyl flooring costs $6,000 to $12,000 installed. Upgraded finishes with tile surrounds, custom vanities, and higher-end fixtures run $15,000 to $25,000. Stacking your new bathroom directly above or below an existing bathroom or kitchen saves thousands of dollars in plumbing because you can tie into existing drain and vent stacks with shorter runs. When that’s not possible, budget for longer drain runs, additional venting, and potentially a sewage ejector pump if the new bathroom sits below the main sewer line, which adds $2,000 to $4,000.
Durable interior finishes make sense for rental units because they reduce maintenance and hold up to tenant turnover. Luxury vinyl plank flooring is more forgiving than hardwood and resists water damage better than laminate. It costs $3 to $7 per square foot installed. Tile in wet areas like bathrooms and kitchen backsplashes prevents moisture damage. Low-VOC paint in neutral colors appeals to a wider tenant pool and is easy to touch up between leases. Install moisture-resistant drywall in bathrooms and any below-grade spaces to prevent mold growth.
Minimum Kitchen and Bath Requirements
- Full kitchen must include a sink with hot and cold water, a cooking appliance with at least two burners and an oven, a refrigerator with freezer compartment, and at least 30 inches of counter space for food prep.
- Full bathroom must include a toilet, a sink with hot and cold water, and a bathtub or shower stall. All fixtures have to have proper ventilation either through an operable window or a code-compliant exhaust fan.
- Kitchen and bathroom must have GFCI-protected outlets, adequate lighting, and proper ventilation to meet health and safety codes.
- All plumbing fixtures must connect to approved water supply and waste lines with proper venting to prevent sewer gas and ensure drainage. Backflow prevention might be required on certain fixtures.
Budgeting, Cost Estimates, and Contingency Planning for SFR Conversions

Single-family to multi-unit conversions range from $25,000 for a simple basement or garage build-out with minimal structural changes to $150,000 or more for a full second-story addition or a complex reconfiguration with extensive plumbing, electrical, and HVAC work. Most projects land between $60,000 and $120,000 when you add one complete living unit with a separate entrance, full kitchen, full bathroom, independent utilities, and code-required fire separation and soundproofing. Your final number depends on the size and condition of the existing home, the scope of structural changes, finish quality, and local labor and permit costs.
Major cost drivers include architect and engineering fees, which typically run $5,000 to $15,000 for detailed plans and structural calculations. Permit and plan-review fees run $2,000 to $5,000 depending on jurisdiction. Structural modifications like beam installation or foundation work run $10,000 to $30,000. Plumbing and electrical separation including panel upgrades and new water heaters run $15,000 to $40,000. Finish work for the new kitchen and bathroom runs $15,000 to $40,000 combined. Add soundproofing and fire separation at $5,000 to $15,000, HVAC upgrades or mini-split installation at $6,000 to $20,000, and separate entrance construction at $5,000 to $20,000. Set aside a contingency of 10 to 20 percent of your total budget to cover hidden conditions like old knob-and-tube wiring, cast-iron plumbing that needs replacement, or termite damage discovered during demolition.
Operating reserves matter as much as construction budget because you’ll carry the mortgage and construction costs during the build, and you might face a few months of vacancy after completion while you find and screen tenants. Budget three to six months of mortgage payments as a reserve cushion, plus an ongoing maintenance reserve of five to 10 percent of gross rent annually to cover repairs, appliance replacement, and unit turnover costs. Insurance and property taxes typically increase after you convert to multi-family use, so get updated quotes before you finalize your numbers.
| Category | Typical Cost Range | Notes |
|---|---|---|
| Design, plans, and engineering | $5,000–$15,000 | Includes architectural drawings and structural engineer reports for permit submittal |
| Permits and plan review | $2,000–$5,000 | Zoning variances or special-use permits may add several thousand more |
| Structural modifications | $10,000–$30,000+ | Beam installation, foundation reinforcement, load-bearing wall removal |
| Plumbing and electrical upgrades | $15,000–$40,000 | Panel upgrade to 200 amps, separate metering, new water heater, additional circuits |
| Kitchen and bathroom build-out | $15,000–$40,000 | Per additional unit; basic finishes at low end, upgraded finishes at high end |
| HVAC, soundproofing, fire separation, entrances | $20,000–$50,000 | Mini-split systems, resilient channels, double drywall, fire-rated doors, exterior stairs |
Contractor Selection, Scope of Work, Permits, and Inspection Milestones

Hire a licensed general contractor with proven experience in multi-unit conversions or complex residential renovations. Check their license status with your state contractor licensing board, verify they carry general liability and workers’ compensation insurance, and ask for references from at least three recent projects similar in scope to yours. Walk those reference job sites if possible and talk to the owners about communication, budget control, and how the contractor handled unexpected issues. A contractor who’s never navigated multi-family code inspections will cost you time and money in failed inspections and rework.
Get detailed written bids from at least three contractors covering the same scope of work so you can compare apples to apples. The bid should itemize labor and materials for each major phase like demolition, framing, rough plumbing and electrical and HVAC, insulation, drywall and finishes, and exterior work. Clarify what the contractor will handle versus what you’ll manage directly, like appliance purchase or final cleaning. Tie the payment schedule to inspection milestones rather than calendar dates so you only release funds after the work passes official inspection. A typical schedule might be 10 percent down at contract signing, 25 percent after rough framing inspection, 25 percent after rough MEP inspections, 25 percent after drywall and finishes, and 15 percent final payment after certificate of occupancy is issued.
Your contractor vetting checklist should cover these steps:
- Verify current contractor license and check for any disciplinary actions or complaints through your state licensing board.
- Confirm general liability insurance with at least $1 million coverage and workers’ compensation insurance if they employ anyone other than themselves.
- Request and check at least three references from projects completed in the past two years, focusing on multi-unit or complex residential work.
- Review detailed written bids that itemize labor and materials by phase and clarify who provides and installs appliances, fixtures, and finishes.
- Confirm the contractor will pull all necessary permits and coordinate inspections. Verify they have working relationships with local inspectors.
- Establish a milestone-based payment schedule tied to inspections, and include a retainage clause holding back 10 to 15 percent until final certificate of occupancy and any punch-list items are complete.
Financing, Loans, and Funding Strategies for House Hacking Renovations

Home equity lines of credit offer flexible funding because you draw only what you need as construction progresses and you pay interest only on the outstanding balance during the draw period. Rates are variable and typically tied to prime plus a margin, so budget for potential rate increases during your project. HELOC approval depends on your credit score, income, and the amount of equity in your home. Most lenders cap the line at 80 to 90 percent of your home’s current appraised value minus any existing mortgage balance. If your home is worth $400,000 and you owe $250,000, you might access a HELOC of up to $70,000 to $110,000 depending on the lender’s loan-to-value limit.
Cash-out refinancing replaces your existing mortgage with a new larger loan and gives you the difference in cash at closing. This makes sense if current mortgage rates are similar to or lower than your existing rate, because you’ll reset your mortgage term and payment. You can typically access up to 80 percent of your home’s value minus the new loan amount. The downside is that you’ll carry a higher monthly payment during construction before rental income starts, so stress-test your budget to confirm you can cover the payment if tenant placement takes longer than expected.
Renovation loans like FHA 203(k) and Fannie Mae HomeStyle let you finance both the purchase price and renovation costs in a single mortgage based on the home’s after-repair value. These loans work well if you’re buying a fixer-upper to convert, but they require owner occupancy for at least one year, which limits your ability to rent both units immediately unless you live in one. The approval process includes contractor bids, architectural plans, and multiple inspections during construction, so timeline and documentation requirements are heavier than a simple purchase loan. Private or hard-money lenders offer faster approval and funding with fewer requirements, but interest rates run 8 to 15 percent and terms are short, typically 12 to 24 months, so you’ll need a refinance or sale exit strategy.
Financing pros and cons by option:
- HELOC: Flexible draw, pay interest only on what you use, variable rate risk, requires existing equity, simple approval if you have good credit.
- Cash-out refinance: Lump sum at closing, fixed rate and term, resets mortgage so monthly payment increases during construction, works best when rates are favorable.
- Renovation loans (203k, HomeStyle): Single loan for purchase and rehab, based on after-repair value, requires owner occupancy and heavy documentation, good for purchase deals.
- Private or hard-money: Fast approval, minimal documentation, very high interest rates, short term requires exit plan, useful as bridge to permanent financing after project completes.
Rental Market, ROI Calculations, and Long-Term Financial Returns
Start your rental market analysis by pulling recent rent comparables for similar units in your neighborhood. Search online rental listings, call property management companies, and drive the area to spot for-rent signs. Focus on units with comparable bedroom and bathroom counts, square footage, parking, and amenities. If your new basement unit is a one-bedroom, one-bath at 600 square feet with laundry hookups and a separate entrance, find other one-bedroom basement or garden-level units within a half-mile radius and note their asking rents and how long they’ve been on the market. Average those numbers to estimate a realistic rent range, then deduct 10 percent as a conservative cushion for your pro forma.
Calculate your gross annual rent by multiplying monthly rent by 12, then subtract operating expenses to get net cash flow. Operating expenses include property taxes, insurance, maintenance and repairs, vacancy, management fees if you hire a company, utilities you cover, and any additional mortgage payment created by your renovation financing. A common rule is to budget 30 to 40 percent of gross rent for operating expenses in a small multi-unit property, though your actual number depends on the age and condition of the home and your local tax rates. Vacancy rates vary by market but budgeting at least 5 to 10 percent of gross rent annually is smart even in strong markets, because you’ll lose rent during turnover and might face an occasional month or two of vacancy between tenants.
Return on investment is the net annual cash flow divided by your total cash invested, which includes down payment, closing costs, renovation expenses, and any reserves you set aside. If you spent $50,000 on the conversion and the new unit nets you $7,000 per year after all expenses, your cash-on-cash return is 14 percent. Payback period is total investment divided by annual net cash flow. In this example you’d recover your $50,000 in about seven years. Cap rate is the net operating income divided by the property’s current market value and gives you a snapshot of the property’s yield independent of financing. If your property is worth $350,000 and generates $20,000 in NOI after the conversion, the cap rate is roughly 5.7 percent.
ROI Formula Breakdown
Cash-on-cash return tells you how much annual income your invested dollars are producing. Calculate it by dividing the annual net cash flow after all expenses and debt service by the total cash you put into the deal, including down payment, closing costs, and renovation budget. A 10 to 15 percent cash-on-cash return is solid for a house hack because you’re also getting principal paydown, tax benefits, and potential appreciation on top of the cash flow.
| Metric | Definition | Example |
|---|---|---|
| Gross annual rent | Monthly rent × 12 | $950/mo × 12 = $11,400 |
| Operating expenses | Taxes, insurance, maintenance, vacancy, utilities, management | 30–40% of gross rent = $3,400–$4,600 |
| Net cash flow | Gross rent − operating expenses − debt service | $11,400 − $4,000 ops − $0 added debt = $7,400 |
| Cash-on-cash return | Net cash flow ÷ total cash invested | $7,400 ÷ $50,000 = 14.8% |
Unit Registration, Leasing, Tenant Screening, and Ongoing Management
After you receive your certificate of occupancy, register each unit with your city if required and set up separate addresses or unit designations for mail delivery. Contact your insurance agent to switch from homeowner’s to landlord or multi-family dwelling coverage, which protects you against tenant-caused damage and liability but costs more than standard homeowner’s insurance. Take professional-quality photos of each unit when it’s clean and empty so you have before-and-after documentation for security deposit disputes and marketing listings.
Tenant screening starts with a clear set of criteria applied consistently to every applicant. A common baseline is the 3-3-3 rule: income at least three times the monthly rent, three positive references from previous landlords or employers, and three months of rent in savings or emergency funds. Run a credit check and criminal background check, verify employment and income with pay stubs or tax returns, and call at least two previous landlords to ask about payment history, lease violations, and property condition at move-out. Document your screening criteria in writing and apply the same standards to every applicant to avoid fair housing violations.
Your lease should spell out rent amount and due date, late fees, security deposit terms, maintenance responsibilities, utility payment arrangements, occupancy limits, pet policies, and lease duration. If you didn’t install separate utility meters, decide whether you’ll cover utilities and price that into the rent, charge a flat monthly utility fee with an annual true-up based on actual bills, or use a sub-metering system where you read the meters and bill the tenant monthly. Property management companies handle screening, leasing, maintenance coordination, and rent collection for a fee typically ranging from 8 to 12 percent of gross rent plus a leasing fee equal to one month’s rent or 50 to 100 percent of the first month when they place a new tenant. Self-management saves the fee but costs you time and requires you to handle after-hours emergencies and enforce lease terms yourself.
Common Pitfalls and a Printable Conversion Roadmap
The single biggest mistake is skipping zoning verification and permit applications because you assume your project is minor or that no one will notice. Cities increasingly crack down on illegal conversions through rental licensing inspections, neighbor complaints, and automated permit tracking. The consequences include fines, forced removal of improvements, inability to rent the unit legally, and lenders refusing to refinance or buyers walking away when you try to sell. Even if you get away with it for years, you’re creating a huge liability that will surface eventually. Always confirm zoning allows your intended use, apply for all required permits, and follow the inspection process through to final certificate of occupancy.
Undersizing electrical service or HVAC capacity creates expensive mid-project change orders and failed inspections. If your plan shows a 150-amp panel and the inspector flags that two full units require 200 amps, you’ll halt construction, order a new panel and meter base, coordinate with the utility company, and pay your electrician for unplanned work. Similarly, trying to stretch a single furnace or air conditioner across two units leads to comfort complaints, thermostat wars, and premature equipment failure. Budget for proper system sizing from the start.
Other frequent pitfalls include ignoring egress window and fire separation requirements, which guarantee failed inspections. Underestimating plumbing surprises in older homes like cast-iron drain stacks that crumble when you tie in new fixtures. Pricing rent based on what you need instead of what the market supports. Failing to budget for vacancy, higher property taxes after the conversion, and increased insurance premiums. Verify contractor licenses and insurance before you sign a contract, because unlicensed contractors leave you with no recourse when work is defective and may void your homeowner’s insurance. Include a 10 to 20 percent
Final Words
Start by confirming zoning, required permits, and whether your plan fits local code and HOA rules. Then settle the layout: egress, fire separation, separate entrances, and stacked plumbing to save money.
Plan upgrades: electrical, HVAC, meters, and soundproofing. Build a budget with 10–20% contingency, get multiple bids, and track inspection milestones.
Use this converting a single-family home for house hacking renovation checklist as a one-page road map. Do the steps, manage risks, and you’ll have a solid small-scale rental that earns while you sleep.
FAQ
Q: What zoning and legal checks do I need before converting a single‑family home into multiple units?
A: The zoning and legal checks require verifying local zoning (R-1 restrictions, density limits), ADU allowances, parking minimums, setbacks, historic-district rules, and rental licensing or HOA restrictions before you proceed.
Q: Which permits are required for a conversion project?
A: The permits required include a building permit, electrical, plumbing, mechanical, and a change-of-use or occupancy permit; plan review times can run 4 weeks to 6 months depending on jurisdiction.
Q: What are the minimum safety and fire‑code requirements I must meet?
A: The safety and fire-code requirements include egress windows (5.7 sq ft opening, sill ≤44 inches), 1-hour fire separations (two layers 5/8″ Type X drywall), 20–60 minute fire doors, and hardwired interconnected smoke/CO detectors.
Q: How small can a legal rental unit be and what layout basics are required?
A: The legal unit size should commonly be 400–500 sq ft with bedroom minimums around 70–80 sq ft, plus a full kitchen, bathroom, and private egress for each unit.
Q: What structural work and assessments are necessary for creating separate units?
A: The structural work needs a structural-engineer evaluation for load-bearing changes, possible stair modifications, separate entrances, and stacking wet rooms to reduce plumbing runs and costs.
Q: How should I handle utilities, electrical service, and HVAC separation?
A: For utilities expect a likely upgrade to 200 amps, separate meters or submetering for utilities, HVAC zoning or mini‑splits, and budget $8k–$15k for electrical upgrades and about $6k per mini‑split.
Q: What are typical conversion costs and how much contingency should I plan?
A: Typical conversion costs run $25k–$150k+, with common line items (kitchen $8k–$20k, bathroom $6k–$12k), permits ~$3k–$4k, architect ~$2.5k, and a 10–20% contingency plus 3–6 months operating reserve.
Q: What financing options can pay for a house hack conversion?
A: Financing options include HELOCs, cash‑out refinance, renovation loans like FHA 203k or Freddie HomeStyle, ADU grants where available, and private/hard‑money for short‑term bridge financing, subject to owner‑occupancy rules.
Q: How do I select a contractor and manage inspections and permits?
A: Contractor selection and permit management start with multiple bids, verifying insurance and references, clear scope and milestone payments, then following the permit sequence with rough and final inspections scheduled.
Q: How should I estimate rental income, vacancy, and returns?
A: Estimating returns uses gross rent minus expenses to get net cash flow, assume 5–10% vacancy, 5–10% maintenance reserve, then calculate cash‑on‑cash and cap rate to pressure‑test scenarios.
Q: What tenant screening, lease terms, and management policies should I use?
A: Tenant screening should use the 3× income rule, credit and references; leases should cover utilities, submetering or billing, rules, and fees; expect 8–12% if hiring a manager.
Q: What common pitfalls should I avoid during a conversion?
A: Common pitfalls include skipping zoning checks, underestimating electrical/HVAC needs, failing egress or fire separation rules, letting scope creep happen, and not keeping a 10–20% contingency.