

Think photos and receipts are optional for a BRRRR refinance? Think again. BRRRR (buy, rehab, rent, refinance, repeat) deals live and die on proof that work happened, was paid for, and passed inspection. Appraisers look for finished, permitted upgrades and lenders want a clear money trail and lien waivers. This post lists the exact documents, photo and financial checks, and a simple, solid filing system that keeps appraisals fair and refinance timelines short.
Core Documentation Required to Validate Renovations for BRRRR Lenders and Appraisers

Documentation isn’t just busywork. When you refinance a BRRRR deal, the lender and appraiser both need proof that your renovations actually happened, that you paid for them, and that they meet code. Can’t show those three things with clean records? Your appraised value drops and your cash out refinance stalls.
The appraiser looks at your documentation to confirm the after repair value you’re claiming. They’re comparing your property to recent sales, but they also need to see that the work is real, finished, and legal. That’s where your photos, receipts, and permits come in. Better records make it easier for the appraiser to justify a higher value. Without solid proof, they’ll assume less work was done or discount unpermitted improvements entirely.
Lenders care about financial trail and compliance. They want to see that you spent the money you said you did, that contractors were licensed and paid, and that the city signed off on major systems. They’re protecting their collateral. If your documentation is thin, underwriting flags it. Your refinance timeline stretches or dies.
Here are twelve document types every BRRRR investor must collect during renovation:
Time stamped before, during, and after photos of every room and exterior feature. Progress photos tied to specific milestones like framing, drywall, finish work. Itemized receipts for all materials showing quantities, unit prices, and totals. Contractor invoices with labor breakdowns, license numbers, and scope descriptions. Building permits for structural, electrical, plumbing, HVAC, and other major work.
Final inspection sign offs and certificates of occupancy or completion. Lien waivers from every contractor and subcontractor showing full payment. Signed scope of work documents listing every task, material spec, and cost estimate. Change orders documenting any revisions to budget or scope, signed and dated. Bank statements or canceled checks proving payment of rehab expenses. Signed lease agreements and rent roll showing occupancy and income history. Appraisal support documents including comparable sales, rent comps, and project narrative.
Miss any of these and you’re handing the lender or appraiser a reason to say no or reduce your loan amount. The BRRRR Method – How Does It Work? walks through the refinance step in detail, and every piece of that process depends on you proving the renovation added the value you’re claiming.
Photo Documentation Strategies That Strengthen BRRRR Appraisals
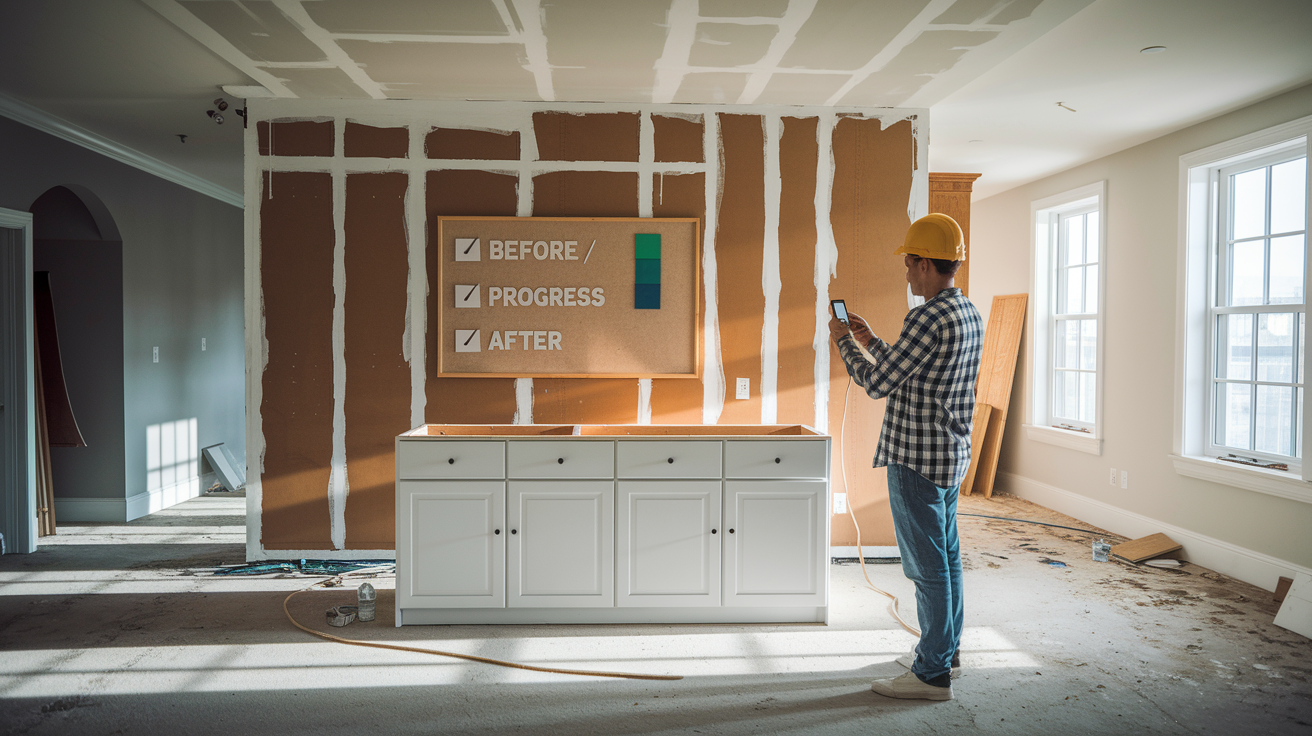
Photos are the easiest proof to collect and the hardest to fake, which is why appraisers lean on them. Start with a full set of before photos the day you close on the property. Walk every room, shoot wide angles and detail shots, and capture the exterior from all four sides. Date those files clearly. Use your camera’s timestamp feature or rename each file with the format YYYYMMDDRoomNameBefore. Do the same thing mid project at major milestones like demo completion, rough in finish, and final walkthrough. Then shoot a complete after set once the property is rent ready.
Video walkthroughs add another layer. A three minute walk through with your phone’s GPS and date stamp turned on creates a time stamped record that’s hard to dispute. Narrate what you’re showing. “This is the new HVAC system installed on March 12th, here’s the permit sticker on the unit.” Keep the video raw and unedited. Store everything in a cloud folder named by property address and organize subfolders by phase: Before, Progress, After, Video.
To keep photos useful for appraisers, enable automatic date and location metadata on your camera or phone. Take at least five angles per room: entry view, opposite wall, ceiling, floor detail, fixtures. Photograph permit stickers, inspection tags, and new equipment serial numbers. Use consistent lighting and avoid filters or edits that change color or detail. Index every photo in a simple spreadsheet with filename, date, room, and what it shows.
Appraisers don’t want to guess when work happened or whether that’s really your property. Clear, dated, organized photos answer those questions before they’re asked.
Financial Proof, Receipts, and Contractor Documentation Required for BRRRR Refinancing

Lenders fund refinances based on verified costs, not your word. That means every dollar you claim as rehab spending needs a receipt with the property address, date, vendor name, itemized materials or services, and a payment method you can prove. Generic handwritten notes or “paid in cash, no receipt” won’t work. If you paid cash, get a signed, dated receipt on contractor letterhead with their license number and a description of work performed.
Your contractor invoices should break out labor hours, hourly rate or fixed price, materials provided, and scope completed. An invoice might read “Kitchen cabinet installation: 16 hours labor at $65/hour, cabinet hardware supplied, total $1,040.” Attach the corresponding bank statement page showing that $1,040 check cleared, or a screenshot of the ACH transfer. This audit trail ties the work to your money and proves you’re not inflating costs. Itemization also helps appraisers assign value to specific improvements. New cabinets carry more weight than a vague “kitchen remodel” line.
Lien waivers prevent ugly surprises at closing. Once you pay a contractor in full, get a signed lien waiver stating they’ve been paid and won’t file a lien against the property. If a subcontractor wasn’t paid, they can lien your property even after you refinance. That creates title problems. Collect a waiver from every trade: plumber, electrician, flooring installer, painter. File them with your contractor invoices. Lenders often require lien waivers as a condition of funding, and missing even one can delay your refinance by weeks while you track down signatures.
Permits, Inspections, and Code Compliance Files that Appraisers Depend On

Appraisers treat unpermitted work as a liability. If you replaced the furnace without a permit, the appraiser may ignore that upgrade entirely or flag it as a code violation that reduces value. Municipal permits prove the work was inspected and meets current building standards, which protects the lender’s collateral and reassures future buyers. Major systems like HVAC, electrical panels, plumbing re routes, structural changes, new windows almost always require permits. Skipping them to save a few hundred dollars can cost you tens of thousands in lost appraisal value.
Final inspection sign offs are just as critical as the permit itself. A permit application shows intent. The final inspection certificate proves completion and compliance. Keep copies of both, along with any mid process inspection reports. If your jurisdiction issues a certificate of occupancy or a certificate of completion for rehabs, include that in your documentation package. Appraisers look for permit numbers and inspection dates that align with your renovation timeline. If the permit is still open or failed inspection, that’s a red flag.
The four most critical permit related documents are permit applications with approved stamps and permit numbers for all major work, final inspection certificates or sign off sheets from the building department, certificates of occupancy or habitability issued after completed work, and specialized permits for HVAC, electrical service upgrades, plumbing re routes, and structural modifications.
When you submit your refinance package, include a summary sheet listing every permit by type, number, issue date, inspection date, and final approval date. This one page index makes it easy for underwriters and appraisers to confirm compliance without hunting through files.
Creating a Lender Ready Scope of Work, Change Orders, and Project Narrative

A scope of work document is your renovation roadmap. It lists every task, the materials you’ll use, estimated quantities, unit costs, labor estimates, and total budget. Lenders want to see this upfront if you’re using a construction loan or hard money draw schedule. Appraisers use it later to understand what you actually did versus what you planned. Start with a simple spreadsheet: one column for task description like “Replace kitchen countertops,” one for materials like “Granite, mid grade, 35 sq ft,” one for labor, one for cost, and a notes column for any special considerations.
Change orders document when the plan shifts. If you budgeted $8,000 for flooring but discovered subfloor damage that added $2,500, write a change order dated the day you approved the extra work. Note the reason, the cost adjustment, and any timeline impact. Both you and the contractor should sign it. Change orders prove you managed the project actively and that cost overruns were legitimate, not padding or guesswork. Lenders and appraisers see change orders as normal. What they don’t like is mystery spending with no explanation.
A project narrative ties your scope and change orders into a story that justifies your ARV. This is a one or two page summary you write for the appraiser explaining what the property looked like when you bought it, what major systems or features were updated, and how those improvements align with neighborhood comps. Something like: “The property was a 1978 ranch with original single pane windows, carpet throughout, and a 20 year old furnace. We installed energy efficient vinyl windows, luxury vinyl plank flooring in all living areas, and a new 95% efficiency furnace. Comparable sales at 456 Maple Street and 789 Oak Drive, both updated in the past two years, sold for $210,000 to $215,000, supporting our post rehab value of $212,000.”
What a Completed SOW Package Looks Like
A lender ready SOW package includes the original scope spreadsheet, all signed change orders in chronological order, the final project narrative, and a cost reconciliation showing budgeted versus actual spend by line item. Add a table at the end summarizing total planned costs, total change orders, final costs, and the variance. If your original budget was $25,000, you had $3,200 in approved change orders, and final spend was $28,000, show that $200 came from contingency and note where. This level of detail tells underwriters you controlled the project and didn’t blow the budget on untracked expenses.
Tracking Timeline, Milestones, and Rehab Progress for BRRRR Underwriting

Lenders care about speed because time equals holding costs and risk. A renovation that drags six months longer than planned raises questions about contractor reliability, project management, and whether you can handle the next deal. Document your timeline with a simple milestone tracker: list the start date, key phases like demo, rough in, drywall, finishes, final inspection, target completion dates, and actual completion dates. Update it weekly and photograph each milestone as you hit it.
Draw schedules are common with hard money or construction loans. The lender releases funds in stages. Say 30% at closing, 30% at rough in inspection, 30% at drywall, and 10% at final. You prove each milestone with inspection reports, progress photos, and invoices for work completed. Keep a log matching each draw request to the corresponding documentation. This log becomes part of your refinance package and shows the lender exactly when work happened and how funds were deployed.
Track these five milestones at minimum: acquisition close date and initial property condition, demolition complete with dated photos and dumpster receipts, rough in inspections passed for plumbing, electrical, HVAC, finish work complete including flooring, paint, fixtures, appliances, and final inspection sign off and certificate of occupancy or habitability.
Organize these by date in a single spreadsheet, and attach the corresponding photos and inspection documents. When you apply for refinancing, this timeline proves the renovation is complete and the property has been stabilized, which is critical for meeting lender seasoning requirements.
Organizing Documentation: Digital Backups, Cloud Storage, and Folder Systems

A messy pile of receipts won’t survive underwriting. Set up a folder structure before you start the rehab, not after. Create a master folder named by property address, then subfolders for Permits, Photos, Invoices, Contracts, Inspections, Appraisal Support, and Leases. Within Photos, create subfolders for Before, Progress, and After. Within Invoices, create subfolders by trade or vendor if you’re working with multiple contractors. Use consistent file naming: start every filename with YYYYMMDD so files sort chronologically, then add a short descriptor like 20250315PlumbingInvoiceSmithPlumbing.pdf.
Scan every paper document to PDF with optical character recognition turned on. OCR makes the text searchable, so you can find a specific permit or receipt without opening fifty files. Store everything in a cloud service like Google Drive, Dropbox, or OneDrive, and keep a local backup on an external hard drive. Cloud storage protects you if your laptop dies, and it makes sharing files with lenders, appraisers, and partners simple. Just send a shared link instead of emailing attachments.
Build an index spreadsheet that lists every document by filename, date, category, and a one line description. One row might read: 20250310KitchenCabinetsInvoice.pdf | 03/10/2025 | Invoices | Cabinet supply and install, $4,200, ABC Cabinets, paid via check 1523. This index becomes your table of contents. When the lender asks for proof of kitchen costs, you look up “kitchen” in the index, grab the file, and send it in minutes. That speed signals you’re organized and credible, which smooths the underwriting process and often speeds up approval.
Avoiding Common Documentation Mistakes that Reduce BRRRR Appraisals

The most expensive mistake is skipping permits on major work. Appraisers see an unpermitted HVAC replacement or electrical panel upgrade and either ignore the improvement or apply a negative adjustment for code risk. Even if you saved $400 by not pulling a permit, you might lose $5,000 or more in appraisal value. Always permit anything that involves structure, systems, or safety. If your contractor suggests skipping it to save time, find a different contractor.
Undated or mislabeled photos are almost as bad. An appraiser receives a photo labeled “new_kitchen.jpg” with no date, no metadata, and no context. They can’t verify when it was taken or even confirm it’s your property. That photo adds zero value to your appraisal. If your before and after photos aren’t clearly distinguishable or you accidentally swap them, the appraiser might conclude you’re misrepresenting the work. Use timestamps, geotags, and descriptive filenames every time.
Here are eight common mistakes and how to fix them. Missing permits: Always pull permits for HVAC, electrical, plumbing, structural, and window replacement. Obtain final inspection sign offs. No before photos: Take a full photo set on closing day or the first day of access. Don’t rely on listing photos. Vague or handwritten receipts: Require itemized invoices on contractor letterhead with license numbers and payment terms.
Incomplete scope of work: Document every task, material, and cost before starting. Update with signed change orders as the project evolves. No lien waivers: Collect signed, notarized lien waivers from every contractor and sub upon final payment. Photos without dates or metadata: Enable camera timestamps and GPS. Rename files with YYYYMMDDLocationDescription format. Mixing personal and rehab expenses: Use a dedicated bank account or credit card for the project. Never commingle funds. Insufficient rental documentation: Provide signed leases, proof of tenant screening, rent roll, and 6 to 12 months of deposit records to support income claims.
What is the BRRRR Method? How does it work? explains the refinance requirements that make documentation accuracy non negotiable. Lenders and appraisers operate on evidence, not promises. If your documentation is clean, complete, and organized, you remove their reasons to say no or reduce your loan amount. If it’s messy or missing, you’re gambling with tens of thousands of dollars in equity you worked hard to create.
Final Words
You’ve got the core checklist: before/after and progress photos, itemized receipts and paid invoices, permits and sign-offs, a lender-ready scope of work, timeline logs, and an organized file system.
We covered photo strategies and metadata, how to link payments to invoices, what permits matter, how to build an appraisal-friendly scope, and the milestone tracking lenders expect.
Follow the checklist and workflow above and documenting renovations to satisfy BRRRR lenders and appraisers becomes routine, not a scramble. Do the work up front and you’ll usually speed the refinance and protect value.
FAQ
Q: What is the 70% rule for brrrr?
A: The 70% rule for BRRRR is a quick buy-price screen: pay no more than 70% of ARV minus rehab costs (Max Purchase = ARV×0.7 − Rehab), preserving a buffer for profit and surprises.
Q: What is the 3-3-3 rule in real estate?
A: The 3-3-3 rule in real estate is an informal tenant-screening shortcut: tenants should earn about 3× rent, show 3 years of stable employment or housing, and have fewer than 3 serious payment problems or evictions.
Q: What is the 7% rule in real estate?
A: The 7% rule in real estate usually means targeting roughly a 7% annual cap rate — net operating income divided by purchase price — as a quick yield screen, though market and strategy change the target.
Q: Can you add renovations to a mortgage?
A: You can add renovations to a mortgage using rehab loans (FHA 203(k), Fannie HomeStyle), or by rolling costs into a refinance or purchase loan, but lenders will require permits, itemized invoices, and proof of payment.